

How it works
- Empty list: any IP is accepted. This is the default.
- With IPs registered: only the IPs in the list can call the API. Calls from other addresses are rejected.
- Exact match: each IP is compared exactly as registered. Ranges and CIDR notation (for example,
203.0.113.0/24) are not accepted: register each IP. - Scope: the restriction applies to all calls authenticated with the Secret Key, from any IP: channels, messages, templates, flows and webhooks. No Secret Key route is left out.
- IP considered: the IP the connection reaches the API from. Headers such as
X-Forwarded-Forare ignored, so sending a different IP in them has no effect. - Time to take effect: after you save, the new list can take up to 10 minutes to apply in the API. This applies to adding, removing or clearing the list. During that window, the previous rule may still apply. The channel connection SDK, which uses the Public Key, is controlled by the SDK authorized domains.
Register the IPs
- In the dashboard, open Administration → Security.
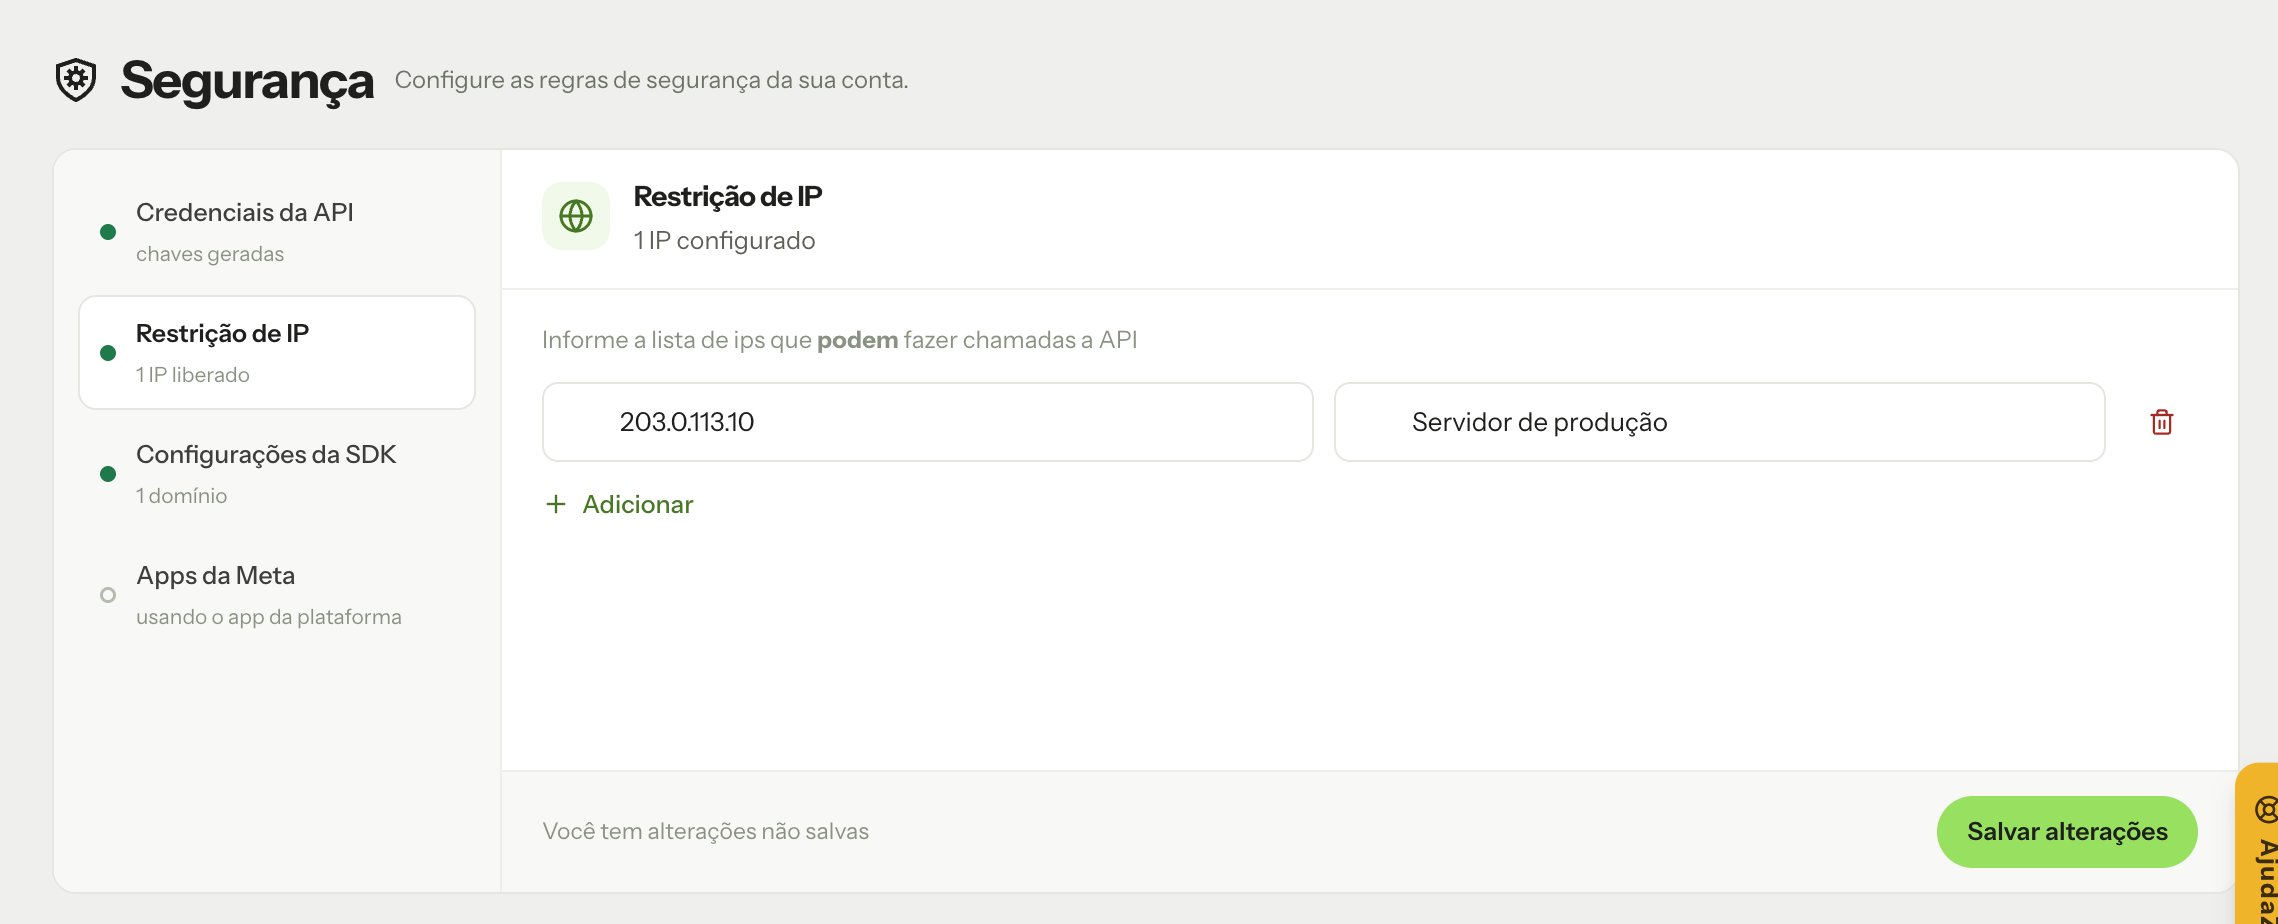
- Open the IP Restriction tab and click Configure now.
- Enter the IP and, optionally, a description to identify it. Click Add to include another IP.
- Click Save changes.
- The system asks for a confirmation code sent to you; enter the code to complete the change.
When moving to a new server, register the new IP before turning off the old one and wait up to 10 minutes. This way calls are not rejected during the switch.
Response for a blocked IP
When the call comes from an IP outside the list, the API responds400 with the source IP:
"ip not allowed".
To fix it, register the IP shown in the message or call the API from a server that is already allowed.